GViking
GViking is a multidisciplinary GPU cluster, supporting a broad spectrum of research needs, free at the point of use to all University of York researchers. GViking has been set up to be similar to the Viking cluster. As such it uses the following;
- Slurm to schedule your workloads
- EasyBuild and Lmod to allow you to load your applications.
- CentOS Linux
If you wish to learn more about Slurm and how to load your applications using the module system see the following wiki pages;
/wiki/spaces/RCS/pages/39167429
/wiki/spaces/RCS/pages/39159178
If you are coming to GViking from Viking please note that GViking does not support the #SBATCH --account option in job script files, please remove this line for use on GViking.
Below we have provided details on the hardware, how to login and the partitions available.
GViking Account Creation
You will need to create an account on Viking before being able to login. The instructions on how to do this are below.
Login into GViking
GViking has a Linux Operating system therefore how you access GViking will depend on what your operating system is on your local machine.
Hardware
GViking consists of:
Login nodes
Login node (no GPUs) 1 core
The login node is a single core VM. It does not have a GPU. If you wish to test your code we recommend using the test partition or the interactive partition if you need to use a GUI.
GPU nodes
- gpu01.york.ac.uk: Asus ECS8000G4 with 8 x A40
- gpu02.york.ac.uk: Asus ECS8000G4 with 8 x A40
- gpu03.york.ac.uk: Asus ECS8000G4 with 8 x A40
- gpu04.york.ac.uk: Asus ECS8000G4 with 5 x A40.
Each server contains
- 2x Intel(R) Xeon(R) Gold 6240R CPU @ 2.40GHz (total 96 cores)
- 512 GB
- 2TB on node storage via /tmp
Fileserver
- scratch: Intel server with 8x8TB SSDs to provide networked /scratch storage
- 44 TB scratch space. Not backed up.
- When you login you will see two folders localtmp and scratch. Please use the scratch area for your datafiles.
- Each user has a default 2TB quota limit. If you need more please contact itsupport@york.ac.uk.
- Each GPU also has 1TB of /tmp space. If you use this please delete your data once you have finished processing.
Available partitions
| Partition name | Max job time | Max number of jobs per user | Max running GPUs per user | Max running memory per user | Number of GPUs in partition | Additional Information |
|---|---|---|---|---|---|---|
| test | 30 mins | 2 running; 4 total | 2 GPUs per user at any one time, minimum of 1 GPU per job | No limit | 29 | Partition for testing small jobs. Request using --partition=test in job script. |
| gpu | 7 days | No limit | 2 | No limit | 29 | Default partition for everything. Max 2 GPUs |
| gpu_big | 48 hrs | No limit | Up to 8 | No limit | 29 | Partition for running jobs that require a larger number of GPUs. Users can request up to 8 GPUS. Need to request using --partition=gpu_big in job script. Please only request 8 if you need them. You can request 1-8 GPUs in this partition. |
| Interactive | 4 hours | No limit | 1 | No limit | 29 | Partition for interactive jobs. This could be used for graphical work with the 8 hr queue limit set to mimic a working day. Need to request using --partition=interactive. |
Support
If you need an application to be installed as a module or if there are other problems please contact itsupport@york.ac.uk in the first instance.
Virtual Desktops on GViking - from a Linux device
Starting and using a virtual desktop on GViking is slightly different to Viking but you can access the GPU node and harness it's power interactively. Below is a summarised list for each of the steps in the procedure with full examples further down. Please be sure to kill the virtual desktop session when you are finished. Only closing the windows will not actually end the virtual desktop and if left running they will take up the shared resources on GViking affecting other users. This guide currently describes only connecting from a Linux computer to GViking.
- Create a session
- Show the log in details
SSHport forward (locally)- Connect via
VNC - Run program or
- Start
srunsession from the virtual desktop - Set
DISPLAYvariables - Run GUI program
- Kill the virtual desktop
1. Create the virtual desktop session
Firstly connect to GViking and from the command line start a new desktop session with:
flight desktop start

2. Show the log in details
You are prompted to type a command to show the log in details of the virtual desktop, we need to run this command. From the example above it is:
flight desktop show bac22487
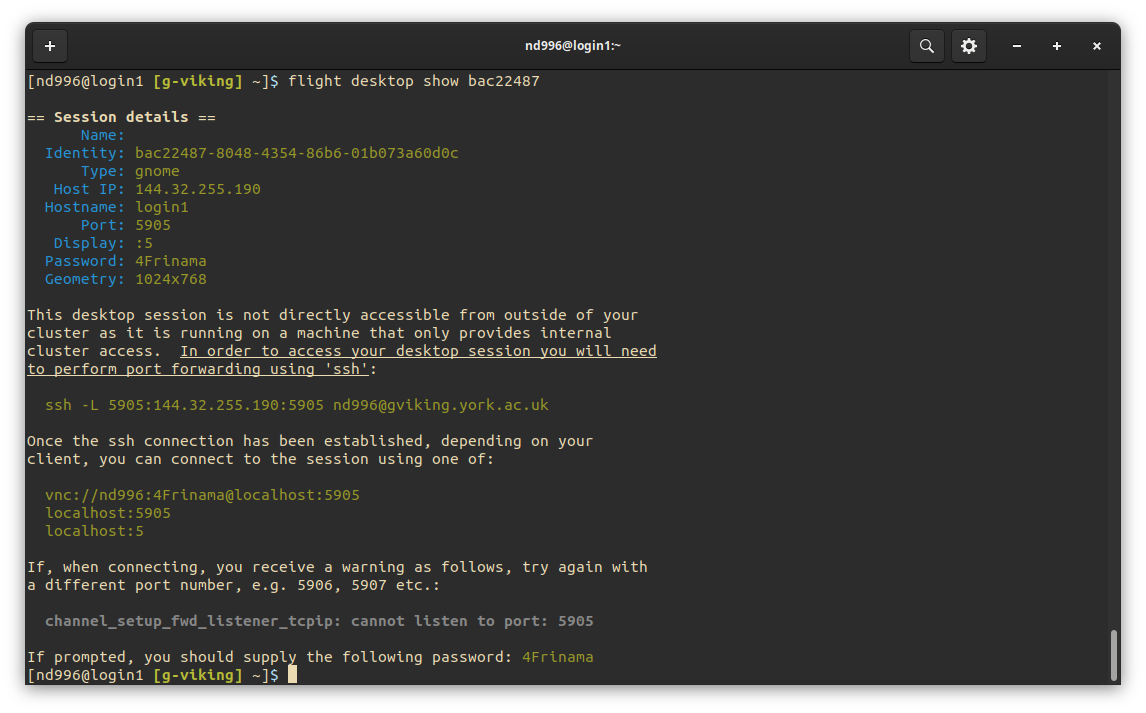
3. SSH port forward
Locally, from a new local terminal session run the ssh command as prompted. In the above example I ran, but yours will be different:
ssh -L 5905:144.32.255.190:5905 nd996@gviking.york.ac.uk
This will forward a local connection over SSH to GViking and allow you to connect a VNC client to the virtual desktop. This local terminal needs to be kept open for the duration of the virtual desktop connection.
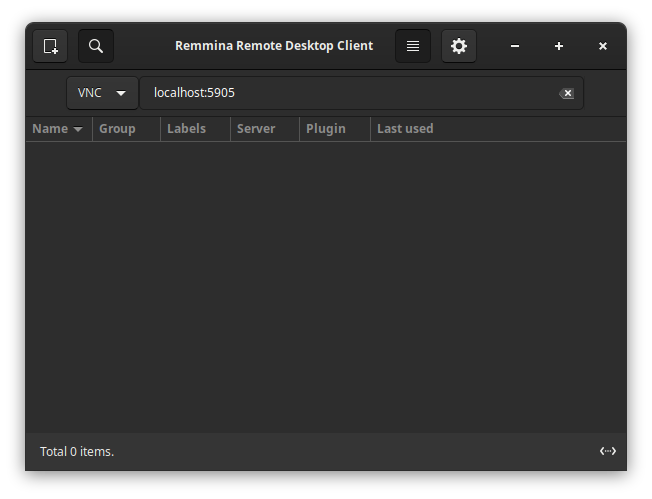
4. Connect with a VNC client
Using the other details from the output of Step 2. connect to the virtual desktop with a VNC client. On my Linux machine this is Remminia and in my example I typed localhost:5905 and ensured vnc was selected from the drop down menu.
When prompted enter the password provided from Step 2.
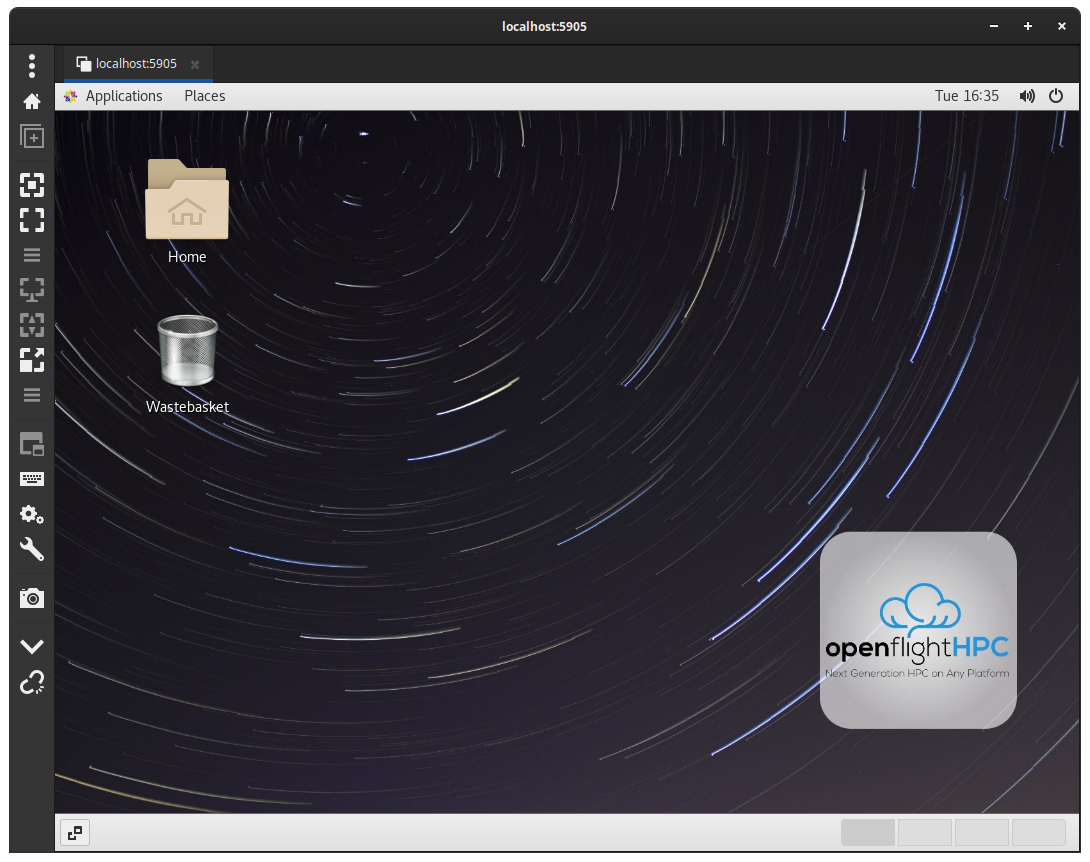
You will now be connected to the virtual desktop.
5. Run program
For quickly viewing or testing an application this is a good environment to work in. There is no GPU being used, everything is on the shared resource of the login node. Please remember to complete Step 9 to kill the session when you are finished. To use the GPUs please continue.
6. Start an interactive session
Once you are connected to the desktop session over VNC, X forwarding from a GPU node can be configured under an interactive job as follows, in this example we request an interactive job for just 15 minutes as a test. This can be a maximum of 4 hours:
srun -p gpu --gres gpu:1 -t 00:15:00 --pty /bin/bash

7. Set the DISPLAY variables
Once allocated, the DISPLAY environment variables must be set, as seen above:
ssh login1 DISPLAY=$DISPLAY xhost $(hostname -s)
DISPLAY=login1$DISPLAY
8. Load modules and run GUI applications
You can now load modules and run GUI programs from this terminal, utilising the GPUs for the allocated time. Please refer to the Viking modules page for general information.
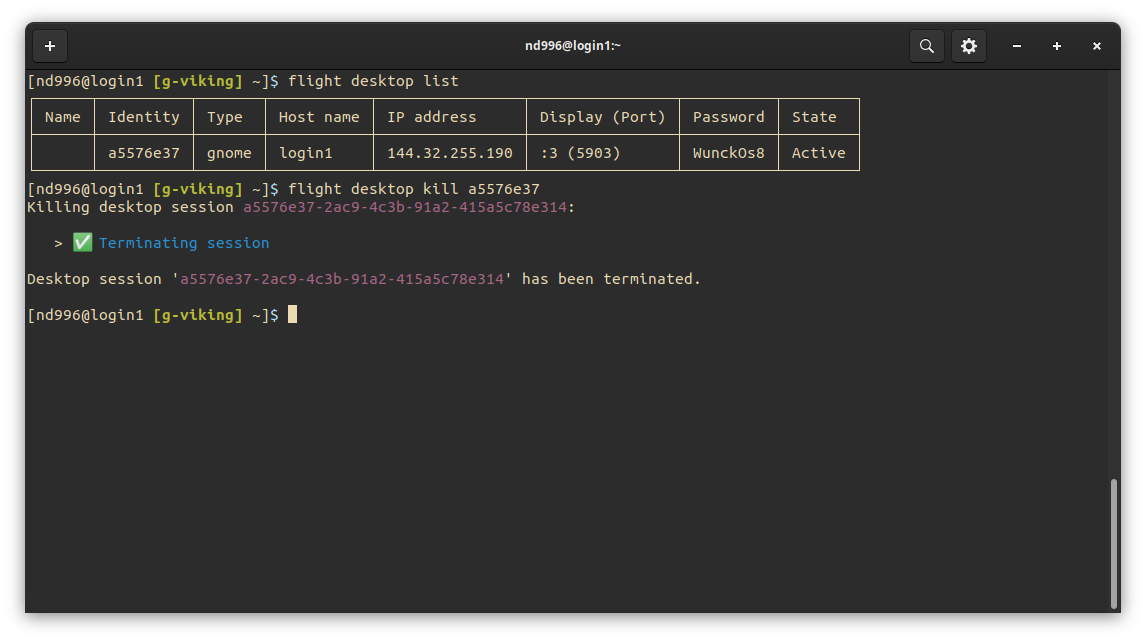
9. Kill the virtual desktop session
It's important to kill off any unused virtual desktop sessions to stop any shared resources being taken up unnecessarily. Close down the Remminia window and then simply request a list of all running sessions from your GViking SSH terminal session and kill any that aren't needed.
flight desktop list
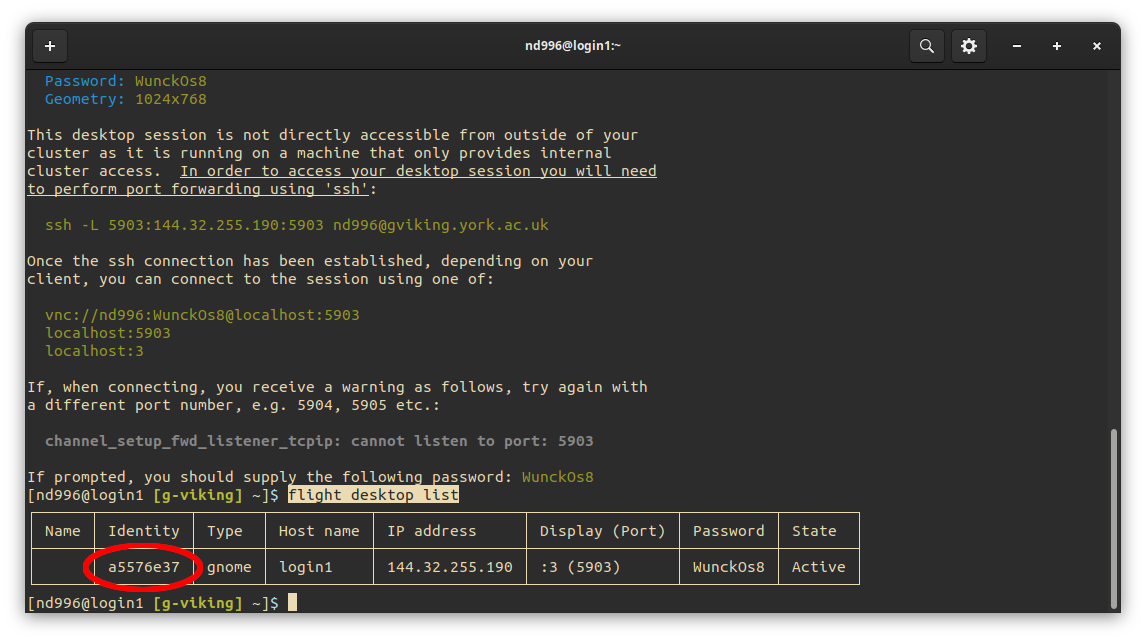
The identity is what we need to kill this session, like the following for this example:
flight desktop kill a5576e37